


Hi, and welcome to a new tutorial. This is Josefine and today I’m sharing something new for me. I recently started a bullet journal and was curious if you could use your mixed media supplies to create new spreads. For those of you who don’t know what a bullet journal is, it’s a calendar, to-do list, reminder, diary, everything you want it to be. Essentially, it’s a notebook that you can totally customize.
Using Dylusions for Bullet Journaling by Josefine Fourage
- Materials
- Instructions
- Dylusions Paint: Pure Sunshine, White Linen, Periwinkle Blue, Mushy Peas, Vanilla Custard, Fresh Lime
- Dylusions Stencils: Heart Border Small, Sugar Lumps Small
- Dylusions Border Stamp & Stencils: Leaf Border
- Dylusions Creative Dyary Stamp Set
- Dylusions Creative Dyary Dy-Cuts: Set 5
- Letter It™ Fineliners
- Archival Ink™ #0 Pads: Jet Black
- Gel Plates: 3 pack
- Ranger Brayers: Small
- Ranger Mini Blending Tool with Foam
Instructions
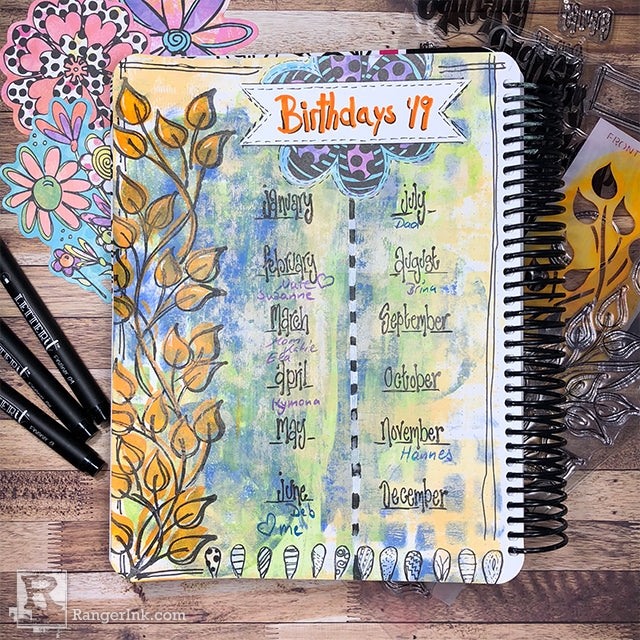
Right now, I’m in the process of creating a variety of spreads for 2019. Year overview, holiday overview, birthday’s, goals, etc and for this tutorial, I’m sharing my “birthdays 2019” page with you.

Step 1: I used a bullet journal with rather thick paper to make sure that it can handle all the paint. Still, I gessoed the page with clear gesso. Then I spread some light colors all over the background using a silicone brush.

Step 2: For the next layer, I used the same colors. First, I brayered them on top of the round Gel Plate and then pressed that on top of the Sugar Lumps stencil. This way I got a partial impression. In addition, I cleaned the Gel Plate on the page to add a few more circles to it.

Step 3: To repeat the pattern throughout the page, I blended some more Dylusions paint through the same stencil.

Step 4: The background was a little too busy, so I toned it down by brayering Vanilla Custard onto the page. First plain, then mixed with White Linen to lighten it up even further.

Step 5: Once I liked the way the background looked, I moved on to the borders. I used the stencil from the Leaf Border Stamp and Stencil set and blended Pure Sunshine through it. Make sure the stencil shows the right side facing up – the one that says “Front.”

Step 6: Then I stamped the Leaf stamp on top of it.

Step 7: Time to setup the calendar. The Creative Dyary Stamp Set 1 has the perfect small month stamps that I stamped about 3cm (approx. 1.2”) apart from each other. I added all my birthdays and a few lines underneath the months and between them. I also converted the lines between the months into a black and white striped flower using the Dy-Cuts 5.

Step 8: The flower felt a little lonely, so I added a bottom border using the small Heart Border stencil and White Linen paint.

Step 9: Then I doodled a little more. The new Letter It fineliners are perfect for exactly that.

How do you like my 2019 birthday overview? I think I like bullet journaling even more now. The ability to use my Dylusions supplies for this as well makes it so much more fun!
Thanks so much for stopping by. I hope you enjoyed this tutorial and might be interested in bullet journaling as well – or, if you already have one, try using your Dylusions supplies for it.


Related Posts

Earth Day Custom Wrapping Paper by Teresa Natividad
This Earth Day, we're inspired by Teresa Natividad’s clever reuse of paper shopping bags—turned into vibrant custom...
Read More